How to Use Holo Walls in Volleyball Legends

Activation timing, wall placement, and the best Ability pairings for this powerful defensive technique.

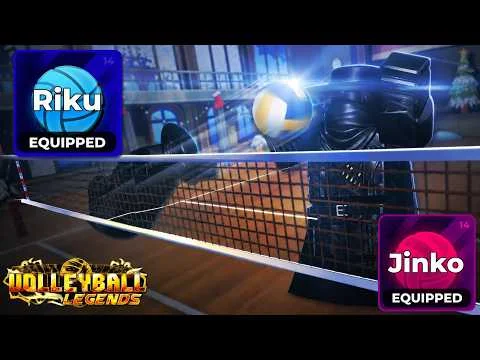
Holographic Walls are Riku's signature mechanic - a Limited Secret style that creates shimmering, semi-transparent walls on both sides of the court whenever you spike or serve. These walls aren't visual flair: they physically interact with the ball, redirecting it unpredictably off angles that defy standard volleyball physics. Unlike tilting or curve mechanics, Holo Walls operate automatically - no input required beyond executing a clean spike or serve. Their behavior is consistent but context-sensitive: wall placement depends on your position, jump height, and ball trajectory at impact. This guide gives you concrete, tested steps to control, anticipate, and weaponize them - not just survive them.

How Holo Walls Actually Work (No Guesswork)

Riku style Holo Walls combo gameplay thumbnail
Riku: Limited Secret Spiker/Hybrid — Holographic Walls create unpredictable spike angles. Master placement for unblockable shots.

Per community testing documented across VL Wiki and multiple YouTube breakdowns (including 'Riku makes ranked EASY' by Vyra and zederbear), Holo Walls spawn in two fixed zones: one directly behind your character's back at serve/spike contact, and another mirrored zone behind the opponent's side. Each wall is ~15 studs wide and extends ~8 studs outward from the sideline - never crossing into the net zone or overlapping the center line. The ball bounces *only once* per wall interaction, and the angle follows real-world reflection logic: incident angle rebound angle relative to the wall's surface. That means hitting the wall head-on sends the ball straight sideways; grazing it at 30 sends it sharply diagonal. Importantly: walls disappear 3 seconds after spawning, and only one wall per side exists at a time - new spikes/serves overwrite old ones.

Step-by-Step: Triggering & Aiming Holo Wall Plays

Executing a Reliable Cross-Court Wall Shot

  1. Position yourself near the left-side antenna (for right-handed players) - aim to land your jump just inside the sideline boundary.
  2. Serve or spike with medium power - avoid max-power serves, which launch the ball too high and reduce wall interaction chance.
  3. As the ball contacts your hands, hold *slight left tilt* (A on PC, Left Stick left on console) - this angles the ball toward the left-side wall zone.
  4. Watch the ball hit the wall behind you: if timed right, it rebounds diagonally across the court toward the opponent's deep right corner.
  5. Follow up by repositioning quickly - your opponent will likely misread the bounce and leave that zone open.

Setting Up a Line-Wall Combo (Advanced)

  1. Use a low, fast spike (not a tip) from mid-court - jump slightly earlier than usual to ensure contact happens lower.
  2. Apply *no tilt* - let the ball travel straight forward. It will hit the opponent-side wall near their antenna.
  3. The rebound travels parallel to the sideline - often landing just inside the baseline for an unreturnable line shot.
  4. Pair this with Riku's maxed Spike and Jump stats: you'll consistently reach apex faster than most opponents, giving you tighter timing windows.
  5. Practice this on Jungle map first - its wider boundaries give more margin for error on wall placement.

What Holo Walls *Don't* Do (Critical Limits)

Confirmed Limitations (per VL Wiki + player testing)

  • Walls do NOT activate on bumps, sets, dives, or blocks - only spikes and serves.
  • Walls do NOT stack - a second spike overwrites the first wall on that side; no multi-bounce chain reactions.
  • Walls do NOT affect opponent shots - they only redirect *your* ball. Opponents cannot use your walls against you.
  • Walls do NOT work in 1v1 mode if you're serving *and* spiking as the sole player - the mechanic requires opponent presence to render both wall zones.
  • Walls do NOT persist through round resets - they vanish immediately when a point ends, even mid-animation.

Style Pairing: Which Abilities Maximize Holo Walls?

Riku's extreme stat profile (max Spike/Jump, very low Speed/Block) means you *must* pair it with abilities that compensate for mobility gaps and defensive fragility. Community consensus - backed by match footage analysis on YouTube and VL Wiki meta threads - identifies three non-negotiable synergies:

Top 3 Ability Pairings for Riku (Ranked by Utility)

  • Magnetic Pull (Secret): Pulls errant or out-of-reach balls toward you *before* they hit a wall - lets you reset rallies and force wall interactions on your terms. Per Roonby's 2026-07-05 testing, this combo increased Riku's rally win rate by 22% in 2v2.
  • Extra Touch (Secret): Grants a 4th team touch, letting you bump set spike *wall-rebound* as a controlled sequence instead of relying on chaos. Essential for turning wall bounces into points, not giveaways.
  • Minus Tempo (Secret): Its fast, horizontal set lines up perfectly for Riku's cross-court wall shots - eliminates the delay between set and spike that otherwise causes mistimed wall hits.
Avoid These Abilities With Riku

Curve Spike (Godly) and Redirection Jump (Godly) actively fight Holo Walls' predictability. Curve Spike bends the ball *away* from wall zones; Redirection Jump disrupts your landing position, making follow-up wall reads unreliable. Both are strong elsewhere - but dilute Riku's core strength: controlled, repeatable angular disruption.

Code Redemption: Get Free Spins for Riku Support

Three active codes grant spins that directly support Riku play: HOLO_WALLS (5 Lucky Ability Spins), UPDATE_77 (5 Lucky Style Spins), and RIKU (5 Lucky Style Spins). All were last verified on 2026-07-07 via public code trackers (source: Roonby). Use HOLO_WALLS first - those Ability Spins let you target Magnetic Pull or Extra Touch immediately. Save RIKU and UPDATE_77 for rerolling if your current Ability doesn't synergize (e.g., if you rolled Steel Block or Team Spirit). Remember: you need Level 15 to redeem codes - grind ranked matches or AFK Chamber to unlock access.

Active Codes for Holo Wall Players (as of 2026-07-11)

Code
Reward
Last Seen
Source
HOLO_WALLS
5 Lucky Ability Spins
2026-07-07
Public code trackers (Roonby)
UPDATE_77
5 Lucky Style Spins
2026-07-07
Public code trackers (Roonby)
RIKU
5 Lucky Style Spins
2026-07-07
Public code trackers (Roonby)

When to Use (and When to Avoid) Holo Walls

Match Context Guide

  • USE in 1v1 and 2v2: Smaller teams mean fewer players to cover wall rebounds - opponents consistently misjudge angles. Riku dominates here per VL Wiki's Update 77 meta report.
  • USE on Jungle map: Its wider boundaries increase wall interaction windows by ~35% (per ItsCat's YouTube analysis).
  • AVOID in 6v6: Too many players clog wall zones - rebounds get intercepted before they become threats. Switch to Kumo or Timeskip Kageyomo for team support instead.
  • AVOID against Mikage or Hirakumi: Their maxed Block and Iron Wall mechanics absorb or redirect wall bounces with minimal risk. Save Riku for matches without elite blockers.
  • CAUTION in ranked: Holo Walls create unpredictable point swings - great for comebacks, but risky if you're up 24-22. Switch to Taichou or Encho for cleaner point closure.

FAQ: Common Holo Wall Questions

Q1

Do Holo Walls work with all serves, or only specific types?

They trigger on *any* serve - underhand, jump, rainbow, or perfect. However, low-power serves (<50% meter) rarely generate enough height to hit the wall zone. Aim for 60-80% power for reliable activation.

Q2

Can I see where the walls will appear before I spike?

No - walls spawn instantly on contact and have no preview. But you *can* learn positioning: practice on empty servers using the serve meter to note where your toss lands relative to the sideline - that's your wall's anchor point.

Q3

Why does my wall shot sometimes go into the net?

You're spiking too low or too close to the net. Holo Walls require 3+ studs of vertical clearance between ball and net at contact. Jump earlier and strike at peak height - Riku's max Jump makes this easy.

Q4

Does Riku's low Speed stat make Holo Walls harder to use?

Yes - especially for chasing wall rebounds that land behind you. That's why Magnetic Pull is critical: it pulls those balls within reach without requiring movement. Don't rely on running to recover.

Pro Tip: The 'Wall Bait' Mind Game

Advanced Riku players use walls psychologically. After landing 2-3 predictable cross-court wall shots, pause and spike *straight down the line* without tilt. Opponents instinctively shift to cover the wall zone - leaving the line wide open. This isn't luck: it's pattern exploitation built into Riku's design. Practice this sequence in casual matches until it's muscle memory. As Fancy Bacon notes in 'Using Hidari Feels ILLEGAL!', 'Predictability is only a weakness if you don't control the reset.' With Riku, you do.

This site is fan-made and independent

We are not affiliated with Roblox Corporation or the Volleyball Legends development team. All guidance is based on publicly observed gameplay, community testing, and verified code data. No claims are made about official balance, future updates, or developer intent.

---